Thursday, December 29, 2011

Baked Ravioli


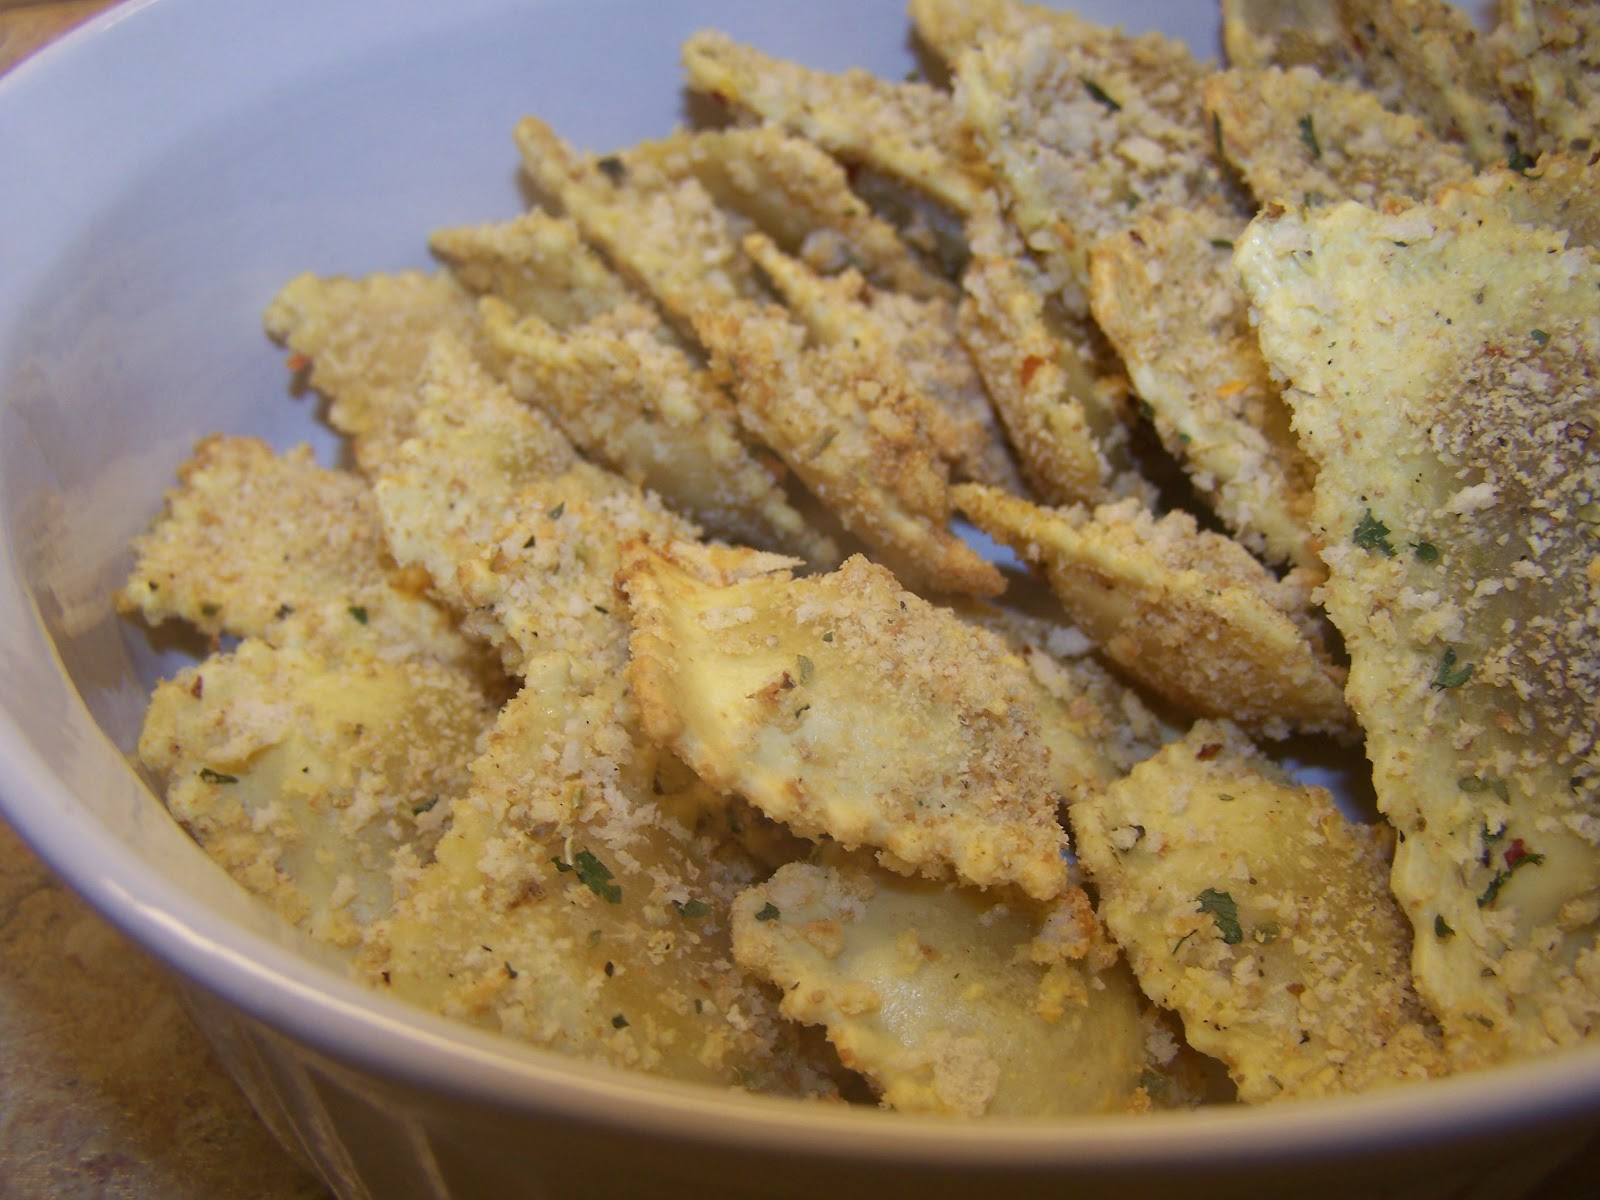
I'm sure you have seen the "Toasted Ravioli" recipes before... the first time I saw one was while watching Giada years ago.  I found a Rachel Ray recipe online that I used for quite some time, until I started making them without measuring ingredients.  My only hesitation with these recipes wasn't so much the frying, but the clean-up.  I loathe cleaning up a pan of cooking oil.  I don't know where to put it.  You have to wash the pan several times.  I don't fry often, obviously.  Blah.  So, I was thinking... why not bake them?  It's healthier, and a lot less messy.  Thumbs up in my house - we all think they are just as good, if not better, baked.  Yay!  We love to eat them as a meal with marinara, and a side of sauteed zucchini.  But, they would also make an awesome appetizer.  Enjoy!
Wishing you best dishes and yummy dreams in the New Year!

xoxo,


Baked Ravioli
(This is a "loose" recipe - I kind of do "a little of this, a little of that")

Fresh Ravioli (our fave is Buitoni's Mushroom Agnolotti)
skim milk
1 egg
1 1/2 c. bread crumbs
1/2 c. grated parmesan cheese
1 tbsp. parsley
1 tsp. red pepper flakes
1 or more tsp. of Italian blend seasoning
a dash of salt and pepper

Prepared marinara for dipping (We love Emeril's Chunky Marinara)

1.  Pour the skim milk so that it half-fills a cereal-sized bowl.
2.  Mix an egg into the milk, stir until it is combined.
3.  In another small bowl, mix together the remaining dry ingredients.  Place parchment paper on a baking sheet and preheat the oven to 350 degrees. 
4.  Take the ravioli (in batches), put them into the milk mixture.
5.  Next, remove the ravioli from the milk mixture, and put them into the bowl with the dry ingredients, coat well.  
6.  Place the raviolis on the baking sheet.  Repeat with the rest of the ravioli, then bake 15 minutes, or until the ravioli are golden brown.  
7.  Heat marinara and serve with the ravioli.


If you enjoyed this recipe, I'd love for you to "like" my FB page, follow me on GFC, or pin my pictures!  Thanks a million!  xoxo

Saturday, December 24, 2011

Week Five of Christmas Cookies: Santa's Sugar Cookies


I can't believe it's already been five weeks of Christmas cookies!  I'm going to need a baking break in the new year!  I just wanted to share some pictures of Santa's sugar cookies.  It's one of the best secret recipes that I have!  Soft, light, sweet, and perfect!  Best dishes and yummy dreams to you and yours!
xoxo,


Merry Christmas to all and to all a good night!

Tuesday, December 20, 2011

A Simple "Foodie" Gift: Cinnamon Sugar Jars


So, a few weeks ago I skipped work.  It was lovely... I played with my daughter, went out to lunch with my husband, lounged around .... wish I could do it everyday.  Anyways, I also caught the show"The Chew" for the first time - I just happened to catch a segment about homemade gifts for the Christmas season.  I've never made homemade gifts ... seeing as how I lack the "crafty" gene ... but this simple idea stuck with me.
This is a great gift, anyone can use cinnamon sugar:  in coffee, tea, cookies, or on toast ... endless, sweet possibilities!  I simply bought 4 mini Mason jars at Target, followed the recipe below, tied a ribbon around the jar with a cinnamon stick, and stuck a bow on top!  Adorable sweetness!
Enjoy this simple, homemade gift!

xoxo,

Cinnamon Sugar Jars
For one jar:

2 c. organic sugar
2 tbsp. ground cinnamon


Sunday, December 18, 2011

Week Four of Christmas Cookies: Peanut Butter Kiss Cookies... Santa's Favorite


We are chocolate and peanut butter lovers in our house!  These cookies have been my absolute favorite since I was a child - they are the softest, most wonderful bite of chocolate and peanut butter.  I also add Reese's minis on top of some of them for an extra peanut butter "kick."  The other "kiss" cookies with 4 or 5 ingredients can't even hold a candle to these amazing cookies!  I don't think this batch will make it long enough to see Santa ;)
Enjoy!

xoxo,


Peanut Butter Kiss Cookies
(Recipe found a long time ago - can't remember where)
Makes about 30 cookies

1 3/4 c. flour
1/2 c. sugar
1/2 c. brown sugar
1 tsp. baking soda
1/2 tsp. salt
1/2 c. butter
1/2 c. peanut butter
1 egg
2 tbsp. milk
1 tsp. vanilla
extra granulated sugar
package of Hershey Kisses or Reese's Miniatures

1.  Mix together flour, both types of sugar, baking soda, and salt.
2.  Melt the butter in a microwavable bowl.  Add it to the flour mixture.
3.  Add the rest of the ingredients to the bowl and mix well (you may have to use your hands).
4.  Roll the mixture into small, 1-2 inch balls.  Roll the dough balls in granulated sugar.
5.  Place the cookies on a pan lined with parchment paper and bake on 350 degrees for 10-11 minutes.
6.  When you take the cookies out of the oven, press the chocolates into the center.  Then, allow the cookies to cool before storing.

If you liked this recipe, I'd love for you to "like" my Facebook page, Pin my pictures, or follow me on GFC!  Thanks so much!  xoxo

Passing on a little Christmas cheer....


Things are so busy these days.. sigh.  But, a little while ago "One Mommy" (one of my favorite bloggers) gave me the Liebster Blog Award (for my second time!)!  I'm so thankful and honored and I want to make sure that I pass it on to some other amazing blogs that I enjoy reading!

In case you are not aware, this award spotlights the up and coming blogs that have less than 200 followers. 

By accepting this award, I get to:

1. Copy and paste the award on my blog.

2. Thank the giver and link back to the blogger who gave it to me. 

3. Reveal my top 5 picks and let them know by leaving a comment on their blog.

4. Hope that followers will spread the love to other bloggers.

Here are some super-awesome blogs that you really should check out:


Carrie's Experimental Kitchen

Cookistry

Elisabeth Jane

Hearty Appletite

Jenny's Cookbook

Thursday, December 15, 2011

Improv Cooking Challenge: Eggnog Cannolis with Craisin "Sprinkles"


In the hustle and bustle of the holiday season, I almost missed the date for the Improv Challenge!  All month, I had planned my dish ... even went on a search for the shells - and I completely flaked on the date of the post.  sigh.  Well, here I am .. better late than never, right?
I have a love affair with cannolis and have always wanted to make them - this eggnog and cranberry challenge was the perfect opportunity!  I looked for a recipe that used milk, and then I just substituted the milk for eggnog and cut out the sugar in the recipe.  They are soooo yummy (and SO easy to make)!  Enjoy!

xoxo,


Eggnog Cannolis with Craisin "Sprinkles"
Cannoli filling adapted from:  Lisa Gianotti

1 1/3 c. eggnog (divided)
1/3 c. cornstarch
1 lb. low fat ricotta
craisins, chopped
cannoli shells

1.  Whisk together 1 c. eggnog with cornstarch and allow the mixture to sit for at least 20 minutes (place plastic wrap touching the surface of the mixture so that "skin" doesn't form).
2.  Heat the eggnog mixture slowly in a sauce pan over low heat.  Stir constantly and add the remainder of the milk.  Stir until the mixture thickens.
3.  Allow the mixture to cool to room temperature, then mix in the ricotta.
4.  Pipe the mixture into cannoli shells and sprinkle on the craisins!


If you liked this recipe, I'd love for you to "like" my Facebook page, or follow me on GFC!  Thanks so much! xoxo

Monday, December 12, 2011

Hide-a-Veggie, "Lighter" Macaroni and Cheese


Mac and cheese is something that I never, ever thought that I would try to "lighten up."  I'm a firm believer in "some dishes are best left to their delightfully bad goodness"!  BUT, the more holiday baking I do, the more I need to lighten up dinner so that I can enjoy some tasty treats without feeling too terrible!  I'd heard of putting butternut squash in mac and cheese ... so, I got into the kitchen, picked a few ingredients, and went to work, sans recipe.  It took 3 tries, but we all think it is an absolutely delish result!  It's perfectly gooey and cheesy, and you'd never know there's a veggie lurking inside!  You'd also never guess that I nixed the milk and butter.  Give it a try - you'll be very pleasantly surprised!

xoxo,


Little Mommy's "Lighter" Mac and Cheese
Serves 5-6

Cooked macaroni noodles (6 cups, at least)
1/2 c. pureed butternut squash (close to half of a squash pureed)
1 c. chicken stock (99% fat free, low sodium)
1/2 tsp. salt (or less)
1/2 tsp. pepper
1 tsp. onion powder
1/4 tsp cayenne (or 1/8 if you don't like a lot of spice)
1 1/2 c. sharp cheddar
1 c. shredded parmesan
1/2 c. low fat, or fat free ricotta
panko bread crumbs
nonstick spray
olive oil

1.  Cut the squash in half, pour olive oil on the meat and bake on a parchment paper-lined baking sheet (squash face-down) on 400 degrees for 40-50 minutes (skin will peel right off when ready).
2.  Puree the squash in a food processor and measure 1/2 c. for the dish.  
3.  Preheat the oven to 350 degrees for the macaroni, spray small ramekins, or shallow baking dish with nonstick spray.  
3.  Place the squash in a sauce pan on medium heat.  Add in the stock and the spices.  Mix well.
4.  Turn the heat down a bit, and add in the cheddar and the parmesan.  Stir constantly.  The cheese will not completely melt (***and that's okay - as long as it doesn't clump.  If it clumps, you have left it sit too long, or the heat is too high.***)
5.  Add in the ricotta at the least minute (only stir to mix the ricotta in, do not leave it on the heat).  
6.  Place plain noodles in the baking dishes, then pour the sauce on top.  Gently mix the sauce in with a spoon.
7.  Toss the panko bread crumbs in olive oil, salt, and pepper and sprinkle them on top of the ramekins, or baking dish. 
8.  Bake for 20 minutes.  Enjoy!  

If you liked this recipe, I'd love for you to "like" my Facebook page to receive "Little Mommy" recipe updates!  Or, follow me on GFC!  xoxo

Sunday, December 11, 2011

Week Three of Christmas Cookies: Family Favorites


Smells can evoke a world of memories.  I have some of the best childhood memories of Christmas - all centered around family.  One of the smells that takes me right back to family Christmases in Pennsylvania is anise.  Several of my relatives always had trays of cookies sitting out when we came to visit and my absolute favorite cookies were the anise cookies.  I know that anise is an acquired taste (my husband can't stand the taste), but to me, they represent love, family, and countless memories.  This recipe is my Great Aunt Ann's recipe, and I'm guessing it was passed down to her as well.  Although I'm pretty much as Polish as you can get, anise cookies are notoriously Italian - I wonder how they snuck into the family recipe book?!
I'm also including one of my husband's favorite childhood Christmas cookies:  jelly cookies.  He loves anything that resembles shortbread, which they do, but with a special sweet twist.
Merry Christmas, enjoy!

xoxo,


Anise Cookies
From the kitchen of Ann N.

1 c. butter
1 c. sugar
1/2 c. milk*
1 tsp. anise
5 tsp. baking powder
3 eggs
5 1/2 c. flour

Cream cheese frosting

1.  Cream together the butter, sugar, milk, eggs, and anise.
2.  Add in the baking powder and flour (slowly) and thoroughly mix all of the ingredients together. 
3.  Line a baking sheet with parchment paper and preheat the oven to 350 degrees.
3.  Roll the dough into small 1 1/2 in. balls and slightly press them down.  Place them on the cookie sheet.
4.  Bake for 15-20 minutes at 350 degrees.
5.  Allow the cookies to cool, then add the frosting.  


"Thumbprint Cookies"
From the kitchen of Laurie C.

3/4 c. sugar
3/4 c. butter*
2 egg yolks (save whites)
1/2 tsp. salt* 
1/2 tsp. vanilla
2 c. flour
chopped walnuts
jelly preserves

1.  Cream together sugar, butter, egg yolks, salt, and vanilla.
2.  Slowly add in flour until all ingredients are combined. 
3.  Roll the dough into balls, dip into egg whites, and roll in chopped walnuts. 
4.  Place on a baking sheet lined with parchment paper, and press your thumb in the center to make an area for the jelly. 
5.  Bake on 350 degrees for 15 minutes.
6.  Allow the cookies to cool, then spoon jelly preserves in the center of the cookie.  


*- denotes changes that I made to the recipes

If you enjoyed these recipes, I'd love for you to "like" my Facebook page, or follow me on GFC!  xoxo  Thanks so much! 

Thursday, December 8, 2011

Co-hosting "It's a Keeper Thursday" Linky Party

It's a Keeper

I LOVE "It's a Keeper Thursday" - Christina is great!  I'm super-excited to co-host with her this week!  Please link up any recipes that you have found to be "keepers"- we'd all love to enjoy them too!
Here is my little addition to the linky party... this one is definitely a keeper!
Click the title to see the recipe and the blog post.  Thanks SO much for visiting!

xoxo,


Here are a few rules for the party:

  • Your link should be a food or craft/project related item.  Link up as many as you’d like!
  • Add my button to your sidebar or blog post – help spread the word!
  • Be sure to check out some of the awesome posts that others have linked upLet them know that It’s a Keeper sent you!

Wednesday, December 7, 2011

Crazy Cooking Challenge: Dark Chocolate Peppermint Fudge


Fudge isn't my thing.  I don't know - I love sweets, but I just can't get into fudge.  I think it's too much in a little package.  However, I love the Crazy Cooking Challenge because it gives me the opportunity to find new, super-awesome blogs to follow... and to try some new recipes!

Photobucket

When I found out that the recipe this month was fudge, I decided to go with something that represented the holiday (peppermint), and I thought dark chocolate might be nice way to cut down on the overly-sweet quality (and dark chocolate is my husband's favorite!).  When searching for a great recipe, I found this blog that I absolutely love now:  A Spicy Perspective.  It's adorable - check it out!
My husband loved the fudge, it was easy to make, it looks beautiful.... and I liked it.  I would gladly make it again.
Best dishes and yummy dreams!
xoxo,


Peppermint Fudge

1 - 14 oz. can of sweetened condensed milk
1 tbsp. of butter, plus extra for greasing the baking dish
1 pound of dark chocolate chips/chunks
1/4 tsp. salt
1/4 tsp. peppermint extract
1 tsp. vanilla extract
Peppermint candies, crushed

Grease an 8*8 dish and place a layer of crushed peppermint in the dish.  Set aside. 

1.  Place milk and butter in a glass bowl.  Place the bowl over about 2 inches of simmering water in a pot (making sure the bottom of the bowl doesn't touch the water).  Heat ingredients thoroughly.

2.  Add the chocolate and salt.  Stir until the chocolate is like a thick cake batter that still pours.

3.  Add peppermint and vanilla.  Pour the fudge into the greased dish.

4.  Top the fudge with the rest of the crushed candy.

5.  Refrigerate for at least 3 hours before cutting with a warm, clean knife. 

If you enjoyed this recipe, I'd be super-excited to have you as a friend on Google FriendConnect, or ESPECIALLY on Facebook!  xoxo

Sunday, December 4, 2011

Week Two of Christmas Cookies: Cinnamon Roll Cookies


These cookies were made with a lot of love, and a little profanity.  Really.  Let me explain... these cookies have been made a million times in the blogging world - we all know there are many variations.  I just so happened to choose a difficult one.  Picture this:  it's 11:00 p.m. and I am at the kitchen counter cursing at the dough as I am desperately trying to roll it up without it breaking.  Grrr.  I am not a baker, by any stretch of the imagination.  I think the thing that bugs me about baking is that a recipe has to be followed to the letter, and even after it is, sometimes it just doesn't come out right.  (This, fortunately, was not one of those cases.)  I don't know enough about the chemistry of food to adjust baking recipes.  I love to cook - I can add, delete, substitute, and change ingredients until my heart is content.  When I cook, I don't usually curse at my food... unless I drop it on the floor.  All that being said and all baking-headaches aside, these turned out FABULOUSLY.  They are every bit as good as they look.  I asked my husband if they were worth the headache, his response:  "They weren't a headache for me."  Of course not, all you did was eat them.  Silly me.  It only took me two days to make them....
Next year, at this time, you will probably find me at my kitchen counter, cursing the dough.  They are that good.  Best dishes and yummy dreams!

xoxo,


Cinnamon Roll Cookies

2 1/2 sticks of unsalted butter, softened
4 oz. cream cheese, softened
2 tsp. of vanilla extract
1 tsp active dry yeast
1 c. sugar
3 3/4 c. all-purpose flour
1/2 tsp. salt

1/2 c. brown sugar
1 1/2 tbsp. cinnamon

3 tbsp. whole milk
1 c. powdered sugar
1 tsp. vanilla
chopped pecans (my addition to the recipe)

1.  Mix 2 tsp. of cool vanilla with the dry yeast.  
2.  Cream the butter, cream cheese, sugar, and vanilla-yeast mixture with an electric mixer for 2 minutes until fluffy.
3.  Turn the mixture on low, add the salt, and slowly add the flour.  Mix until combined.
4.  Shape and press the dough into a flat disc on plastic wrap.  Wrap it up and allow it to cool in the refrigerator for at least 1 1/2 hours. 
5.  Preheat the oven to 375 degrees.  In a small bowl, mix together the brown sugar and cinnamon. 
6.  Cut the dough in half, leaving half in the fridge.
7.  FLOUR your rolling pin and wax paper well, then roll the dough into a rectangle shape about 1/4 inch thick and 7*18 inches in size. (Trim the edges to make a rectangle.)
8.  Sprinkle half of the cinnamon and brown sugar on the dough.  Leave area on the edges of the dough clear.  
9.  Slowly, roll the dough up and seal the end seam.  Wrap and place the dough back into the fridge to chill (it makes it easier to cut).  
10.  Repeat with the other set of dough.  Then, cut the rolls into 1/2 wide cookies.  
11.  Place the cookies on a sheet lined with parchment paper.  Bake for 9-10 minutes.

12.  Allow cookies to cool completely, the mix the powdered sugar, vanilla, and milk to make the glaze.  Dip the face of each cookie in the glaze, then sprinkle with pecans (my little addition).  Set them to dry.


If you enjoyed this recipe, I'd be super-excited to have you as a Google Friend Connect follower, or for you to "like" my Facebook page!  Thanks so much!

I also shared this recipe with:
http://theartsygirlconnection.blogspot.com/2011/12/pininspirational-thursday-11-linky.html
and the cute buttons on the side bar!